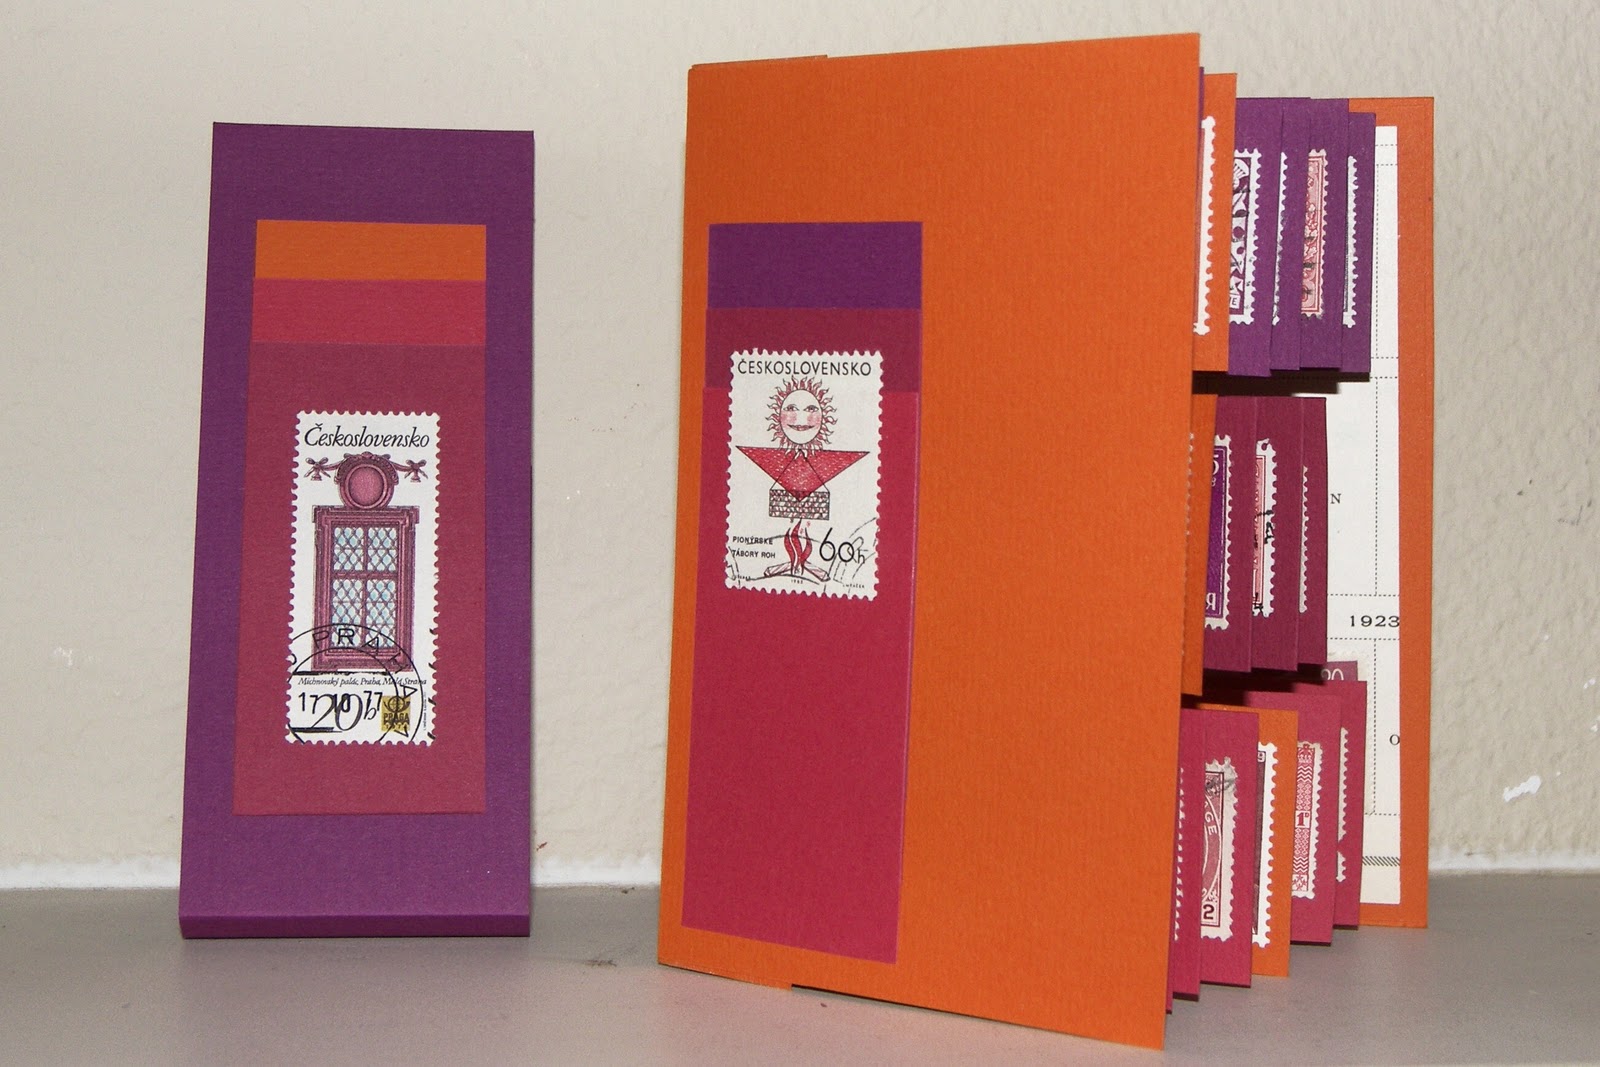
Showing posts with label Handmade Book. Show all posts

Thursday, June 23, 2011

England 2007 Journal Part II

We are now about halfway through this book and it is starting to get pretty full...and that is the problem with this style, as nice as the pockets are, they really don't take as much as I am likely to want to save.  But then, I guess that is my problem.
Pretty much more of the same.  There is a story behind the photo of the performance artist in Winchester on my regular blog here http://animumadvertere.blogspot.com/2011/06/more-winchester.html
I took vintage postcards with me, most made into tags, and wrote on the backs.  I also purchased new postcards and wrote on them.  After I got home, I did prune back some of the paper, largely by only saving relevant parts or front pages.
I must make a confession here, I never did find anything suitable to put in the nifty pocket I attached to the inside back cover.  I am confidant something will come to me - it has only been four years after all.
And of course, the back cover had to have my beloved Tower Bridge, a wonderful rubber stamp by Claudine Hellmuth.
I think I have covered most of the various things I put in the pockets, but here are a few examples:

From the top: one of the vintage postcards made into a tag and embellished with a postage stamp; a rubbing from the church shown on the reverse of the postcard I glued it to; the bill from a hotel with a humorous exchange as we drove into the town; a cartoon I had saved before the trip.

I really didn't take much other than the actual book on the trip.  I took some thin paper and soft pencil for tracing, a glue stick, a couple of fine line pens and as mentioned, blank tags and vintage postcards.  The most important thing is to keep the book with you and when something wonderful or clever or funny happens - write it down immediately, on a card or the bill or the back of a ticket stub.  You can never quite remember them perfectly later, and these are the things that make travel journals special.
Some sample jottings:
   Poetic...The Quiet, the absolute peace and quiet atop Dartmoor, a sheep bleating across the valley, a crow passing by, and occasionally a gust of wind ruffles the gorse.
   Amusing...After I left the shop I sat on the rockery in front and watched the world go by. Then I visited the PO and bought some stamps, then sat on the rockery again for a while.  A sweet old lady who had passed me coming and going stopped and asked me "Are you hatching something dear?  And isn't your bottom cold?"
   A B&B...Period Living & Traditional Homes Finalist - Best Tea Shop 2004-2005.  NO BIG SURPRISE THERE! So far, best pasty, best cream tea, best furnishings, best mattress, best full English breakfast and best host - that would be John - a real charmer.
   Food...Tomato & fresh orange soup with a great hunk of granary bread & plenty of pure Dorset butter - and not one drop spilled on my white blouse.

My June book, which will be posted soon, is a version of a pocket book which I worked up myself considering the things I didn't like about this one.  Like all such enterprises, I solved the problems with this book and wound up with some wholly new ones I hadn't anticipated.

Monday, June 20, 2011

England 2007 Journal, Part I

I learned to make this book at a workshop.  The pages are folded 12x12" scrapbook papers and at that time I only had a reasonable amount of 12"x12" paper to work with (as opposed to the very unreasonable amount I now have) so the color scheme was determined pretty much by what I had the most of.  Although I am very happy with the book in general, it turned out to be a bit thick, rather clunky.  The book was made and much of what eventually went in the pockets was prepared before the trip.  After we got home, I decorated the pages, copied over some of the jottings, and added some bits I had at home.


The pages had punched holes and were bound by some elastic ribbon I was lucky enough to find in the perfect colors.  I had been saving a couple of pewter Tudor Rose buttons for just such a project.  The bookplate is also metal.

I feel that I need to explain why the Journal is titled York 5x3, especially since we didn't go anywhere near York.  Our first trip to England, and the Journal from that trip was entitled 'The Great York Expedition - and we did go to York.  When we began planning the second trip, thinking we would go back to Yorkshire, I called it 'York 2'.  Understand that I probably had a dozen Excel spreadsheets preparatory to making the trip and so I needed an umbrella title.  Although we eventually didn't go to York on the second trip, the name stuck and we had started a tradition of sorts.  So the third trip was lazily called 'York 3'.  Then along came the fourth trip in 2000 - what a lark to be able to call it 'Y2K'.  The fifth trip included my son-in-law so there were three of us and it became York '5X3'.  Amazingly enough, the sixth and most recent trip actually included York and was largely centered around a group of old friends visiting all seven of the Betty's Tea Rooms in Yorkshire - so it was York4T...get it?  I am already working on an itinerary for the hoped for next trip - goodness knows when or how - and it does not include York, but I simply have nothing clever yet in the way of a title.

The Vintage postcard I decorated the inside cover with is by the photographer Fred Judge whose cards I collect.  Like everything else I do, the pages and pockets of this book were highly decorated with postage stamps.  I also used rubber stamping and some stickers.  Beer mats made great additions to the pockets.

I took along blank pieces of paper already stamped and tagged, and wrote on them as we traveled.  I tried to capture the little things that made us laugh or caught us by surprise, I wasn't worried about listing exactly where we went or what we did when.  These pockets have another beer mat (I'm awfully fond of cider) and a small brown paper envelope with a pressed oak leaf from the Cotswolds.
And here is a journaling hint for you.  Since customs looks down on bringing any flora or fauna back into the country, I always take a thick paperback for reading.  On the trip I tuck a few leaves, feathers and flowers into the pages and keep it closed tight with a heavy rubber band.  By the time I get home and unpacked, everything is nicely pressed.  No one has caught me yet.....

More notes, one of my best photos, and a notecard.  I used a teabag wrap as a pocket and managed to pull a price tag from one of my small purchases.  I had a small clear envelope that I filled with several small coins.

A playing card from a childrens game, the lid from clotted cream (don't knock it if you haven't tried it), a theatre ticket, and another plastic envelope with another oak leave and a car park ticket.

Tags, notes, pressings, postage stamps, rubber stamps, stickers, a vintage photo, and more postcards.
This is the first half of the book and I will finish in the next post.

Sunday, May 22, 2011

May Ribbon Book

I have spent hours poring over my various books on books, sorting through the hundreds of variations on the scores of bindings, stitchings, and creative permutations.  Eventually a few rise to the top as ones you are a little afraid of, as well as the ones that you just have to try.  I am still avoiding the scary ones while trying to advance my education and skills.  So this month I made two 'ribbon books'. The instructions came from The Handmade Book by Angela James.

The cover and finishing is quite simple, but there is new stitching to learn for binding the signatures together.  I started with six signatures and sewed them together using a running stitch up and back down each signature.  As you add the third signature you begin going back and using a 'kettle stitch' to bind the signatures together.  Typically a proper book has stitching over two or three pieces of tape which are bound into the cover.  In the ribbon book, you use ribbon instead of tape, make slits in the folds of your cover paper and pull the ribbon ends out through the slits, tying them on the outside.  This keeps the book block safely attached to the cover.


For the first book I used lavender text weight paper with some darker sheets and some floral print sheets dropped in here and there.  The ribbon was a heavyweight gauze and I used a stitch pattern for three ribbon ties.  The only problem I had was that the book block didn't feel as snugly together as I would have liked.

Nevertheless, I was so pleased with this first one, I decided to make another one.  This time I used a natural shade paper - text weight but on the heavy side and I used a woven cotton ribbon with only two ties.  I have a friend who recently bought a very nifty little travel trailer and she asked me to keep a lookout for a book that would suit her for a travel journal.  I wasn't far into this book when I realized it was perfect for her.  So I finished this one with travel and nature quotes handwritten on a dozen pages, rubber stamped images in shadow shades on about every third page, and I pulled some of my best postage stamps of plants, animals and trees for another dozen pages.  Finally, I finished the cover with a feather from my precious stash of bits smuggled back from England and used a stamp pad to darken all the edges - both cover and text block.

The feather came from the Tithe Barn in Lacock in the Cotswolds.
I can say with confidence that my friend was pleased with the book and I have an idea for another one with a slightly different theme for someone that was quite envious, so this probably won't be my last ribbon book.

Monday, May 2, 2011

72 Booklets and Counting

In my rash of booklet making, I was able to almost completely use up a small stash of 8 1/2" x 11" art papers I had been saving for....who knows what.  The magazine Somerset Studios publishes several free pages of art paper in each issue and of course, I have saved them all.  Because I needed to cut around the credit printed on the back of each sheet, I wound up making a pair from each paper - one 5" tall and one 4" tall.  I finished them with beads and my regular postage stamp on the back.


As an added bonus, by the time I had used up all the pages that worked for me, I was able to let go of the remaining 8-10 pages and that is one little stash gone.  And just in case anybody is interested, you can easily make 45 booklets in the time it takes to watch four Premier League Soccer (football) games.

Although I have already moved on to my May books, there are about 3 weeks left in the Premier League season, so I will be making a few more booklets, including a couple of variations.

Wednesday, April 27, 2011

And just a few more...

Like most everyone, I seem to be especially susceptable to sales pitches at 3: in the morning.  Although I readily admit to having a stock of 12"x12" printed paper that rivals most craft stores, only one batch came from one of those late night bouts of insomnia.  This collection was quite large with text weight and embossed cover weight papers - even a few flocked pieces.  There was zebra, leopard, snake, alligator, and ostrich skin as well as two shades of leather and a cowhide.  All of the above came in shades of brown, black, and white as well as, quite amazingly, a bright pink set and a rather chartreuse set.  Like most other things bought from one's TV in the middle of the night, the papers sat on my shelves, untouched, for at least two years.

So when I thought about making matched sets of booklets to use as gifts, they popped into mind.  If I do say so myself, they were just perfect.  So far, I have made six sets of three.  Each set has a 8 1/2 x 5 1/2, a 4 1/4 x 5 1/2, and a 3 x 4 1/2 three-hole bound booklet.  They have a printed lining paper inside the cover and the large one has beads attached to the waxed linen binding thread.  They all have appropriate postage stamps on the back cover.


I can easily finish three sets of three in the time it takes to watch two English  Premier League Football (Soccer) games.  Unless Liverpool is playing, then I spend too much time actually watching the game.

Thursday, March 31, 2011

Starbucks ATC Book

Back in 2002-2003 I participated in quite a few ATC (Artist Trading Card) swaps through an online site called Nervousness - now just a sad shadow of its former self.  One of my favorite themes was 'coffee' facilitated by my daughter coming into possession of a bag full of Starbucks stickers.  You will note that I changed cups from the original challenge photo, simply because the ATC's wouldn't fit in the smaller cup, I couldn't figure out how to hinge it, and having a transparent 'binding' seemed like a very good idea.

I put beans in the bottom (smells really good when you open it up)
I had a great poem I had saved relevant to coffee, and I can only assume Seattle, which I printed and stuck in the back of the cup.  The ATC's were put in cut-down plastic sleeves and I bound them into an old promo booklet emptied of inside pages.  I used linen thread, the perforations in the sleeves, and the original staple holes to bind the book.  Then I glued the book to a straw, secured it with an empty sugar packet, and for good measure to keep the back page flat I glued in a Starbucks gift card.
The two ATCs shown are mine, you may recognize the stickers. The rubber stamp was hand cut by my daughter.  Altogether there are 7 ATCs in the book.
 Here is the poem:

A New Lifestyle
People in this town drink too much
coffee. They're jumpy all the time. You
see them drinking out of their big plastic
mugs while they're driving. They cut in
front of you, they steal your parking places.
Teenagers in the cemeteries knocking over
tombstones are slurping café au lait.
Recycling men hanging onto their trucks are
sipping espresso. Dogcatchers running down
the street with their nets are savoring
their cups of mocha java. The holdup man
entering a convenience store first pours
himself a nice warm cup of coffee. Down
the funeral parlor driveway a boy on a
skateboard is spilling his. They're so
serious about their coffee, it's all they
can think about, nothing else matters.
Everyone's wide awake but looks incredibly
tired.                -James Tate

I have so many wonderful poems saved from my daily Writer's Almanac email, I hope I can find a way to use more of them.

Tuesday, March 8, 2011

Cousin Convention Book

I almost forgot about this book, it might actually be the first one I made.  It was done for what we call our Cousin Convention in 2001.  There are seven of us left on my Mom’s side and thanks to the brilliant idea of my cousin-in-law Dick, we have been meeting every two years for a long weekend.  It has not only kept us all in touch, but has given the next generation a chance to get to know each other.  We have met in Seattle, Charleston, and all over Montana.  I made one of these little booklets for each of my cousins – and for once, I thought to make one for myself.

This is the front and back covers - the booklet consists of a single sheet folded into five panels.  The front includes a basic family tree and a scan of a postcard sent to my grandmother in 1949.  As usual, I used postage stamps and rubber stamps and a quote, pretty standard items for me.

This two-fold includes grandparents wedding photo, scan from a baby book, another postcard scan (from 1919) and a photo of the old homestead with a yellow rose that has grown to cover yards of ground around the building remains.

On the left, a photo of Grandma and chickens at the 'new house' (this side of the Baldy) and pheasant feathers.  The right page was personalized with family photos for each branch of the family - my Mom on the chair and four generations showing me on Grandma's lap.
I worked very hard to make everything on this book meaningful - all the postage stamps related to us in one way or another, pheasant is standard fare in Montana - but I must admit, the joss paper was a bit of a disconnect. 

Wednesday, February 23, 2011

February - Flag Book

As my January books were all very conservative and traditional, I decided to go for color in February and chose a flag book. Flag books use an accordion binding with rows of pages (the flags) glued to both sides of the folded spine.  When you open it as you would a regular book, with the pleats still fairly close together, the pages - or should I say rows of pages - turn as you would expect.  As the pleats are pulled open some of the flags face the cover and some the back, depending on which side of the folds they were attached to.  Then when you pull the book out flat you see only one side of each flag.

If this all sounds confusing, try putting one of these together.  It is one of those things that sound simple, and in fact is simple, but when you are doing it there is a contant state of panic that you have glued something to the wrong side of something...and I only did that once. 

I had some wonderfully colorful paper and rather thought I would start on the book without knowing for sure what would go in it.  It doesn't make much sense to make one of these blank and I soon saw that the art or attachments really needed to be put on the flags before they were assembled.  So, I fell back on my tried and true postage stamps.  I pulled the page that had all the canceled stamps to match my colors - yes, I sort my stamps by color, doesn't everyone?

When barely opened, you can see it looks quite normal. I made a paper band to keep the book closed which simply slides off and on and covers the decoration on the front cover.

Partially opened you can see both sides of the flags.  I used more of the paper from my old stampcollecting book for the endpapers - ones with matching colors of course.

And here we are fully opened, with flags going in opposite directions.  I used only stamps with faces on the sides which would show when opened.  The other side of each flag had a stamp with a heraldic device of some sort, mostly lions.
I would like to do another flag book, but I am waiting for inspiration to strike.  As I worked on the book I realized it was the sort of book that is absolutely perfect for a few applications, but not really appropriate for most.  One of the best things about it is that is was finished on the 17th of February, so my goal of making a new book every month is so far intact.

Friday, February 11, 2011

Leaves Book: Part Two

I have to laugh at the amount of leaves I pressed that year.  It was lovely to have so many to choose from when I made this book, and I did use some in ATC's, but I must have pressed hundreds - really, several hundred - and I couldn't possibly have used more than fifty altogether at the time.  I still have a drawer full of them, sadly fading, and probably destined to fade away to brittle bits.  When that happens, I'll just go out collecting and press a couple hundred more.

Gold envelope for rubber stamped tag, maple leaves.

Pocket for tag, postage stamp, tassel, rubber stamps.
This page was another clear envelope with additional transparent pocket and vintage photo.
Handmade paper with leaves embedded. Blackberry on the left.

Postage stamp, and the same leaves as in the envelope.

I edged this page and the next with latin names of my favorite trees.
Postage stamp, rubber stamps, small envelope
It was surprising how some of the prettiest leaves when pressed were quite unimpressive.  The biggest surprise was how blackberry leaves kept a dainty red border.  I found a laceleaf maple in glorious red and orange outside a Starbucks with very tiny leaves and I think I used every one of them in one project or another.

When I conceived this book, I went through all my materials and scraps to pull everything leaf-related.  The process itself was great fun, but more importantly it reminded me what else I had waiting tucked away for other projects.  It is often a joke among my friends how I continuously organize, sort, and arrange all my materials, but just going through them is an enormous inspiration - every bit as much as books and magazines.

Tuesday, February 8, 2011

Leaves Book: Part One


 About the same time I made the Copper Book for my daughter, I made a Leaves Book for myself.  Having spent the fall pressing leaves I was well supplied.  The book was made the same way as the Copper Book: hard covers with accordion spine and individual pages glued in.

The tassel made from yarn, threads, beads, and a copper tag. 
The covers were made with a handmade paper with natural bits in it and the back stamped with gingko rubber stamps.  The pressed gingko leaf has lost its stem I am afraid. 
Postage stamps and maple leaves.
A piece of handmade paper with a leaf embedded and two skeleton leaves.
This page was a clear envelope with the largest leaf inside the envelope.  I used clear embossing powder on the leaf and it has cracked a bit with use.
This leaf was embossed with a very granular rusty powder.

The other two Canadian postage stamps, joss paper, plastic leaves and rubber stamped leaves.

There are so many lovely quotations about leaves I was hard put to choose.

Monday, February 7, 2011

One More for January


My January book project has bled over into February a bit, but I feel that I have a handle on the stab binding technique even though I didn’t try any of the fancier binding stitches.  I am sure I will be making more books with this technique as I have a lot of papers that suit the Japanese style binding.

There are several errors on this book, which I could just conveniently forget to mention, but I think I remember saying something about confessing my mistakes honestly.  When I glued the paper onto the board pieces (I used mat board) I didn’t use quite enough glue and there are a few spots with slight bubbles.  Since this was the first time I made covers using two pieces on each side to form a hinge, I was quite nervous about getting both pieces placed correctly and while fussing about that I used the white side of the mat boards on one cover and the tan sides on the other.  Now you can’t see both sides at the same time, so no one is likely to notice it, but I know.

One small thing I learned, since I used my Dremel tool to drill the holes, the hole where the drill bit comes out is cleaner than where it goes in so I will drill from the back in the future.

I sewed the binding so that the tie would be on the front and used some beads to decorate the thread ends.  The insides of the covers are of solid purple card stock and the text block is a textured cream paper.  The Japanese script decorating the front is from one of my ‘collage source’ books and I have absolutely no idea what it means…or even if it is right side up

Since this is real book, I will sign it, something I forget to do too often.

Tuesday, January 25, 2011

Copper Book: Part Two

Most of the pages in the book are black scrapbook paper with a very soft finish.  I made the book to a specific square size so I could use two envelopes I had, one black and one metallic copper.  This gave me several places to put items that for whatever reason didn't fit on any of the regular pages.
The black envelope with postage stamps, bits of stamped handmade paper, and a mulberry paper with copper colored seed heads in it.

Vintage photo, vintage ticket stubs, vintage postcard, wax seal, postage stamps.

Feathers, postage stamps, top of wine bottle foil, and rubber stamping.  The crows are stamped on a little booklet with vintage drawings of roosters.

Blank greeting card embellished with metallic rubber stamping and metalic pen.  The inside is covered with bits of Japanese newsprint. 

Vintage photo in metallic photo corners on the copper envelope with small tassel attached.

Vintage page, small envelope and tags, yarn.

Some of the items in pockets: Handcolored ATC, rubber stamping, collage materials.  In the upper right is a small booklet shown at the top of the photo below.

Postage stamps, rubber stamping, vintage postcard of Paris flower seller.

My daughter is back to being a dishwater blond again, but for now, she has the Copper Book to commemorate her redheaded years.

Monday, January 24, 2011

Copper Book: Part One

The second type of book I learned to make had an accordion pleated spine with pages glued in and a ribbon binding.  From this first one, I learned that you need more than one ribbon on the binding and that folding paper into an accordion (or concertina) isn’t as easy as it looks.  I now know the secret is to fold the long sheet in half, then fold each half in half, and so on.

My beautiful daughter had gone from an entire youth spent as a blond to a dishwater blond (my genetics) with red highlights (her Dad’s genetics).  She decided to become a redhead, a startling auburn redhead.  I could not get used to her with auburn locks, even though it was a lovely color.  So in an effort to show her some support I dug out all my copper-to-sepia material, added lots of black, and made her a book.

The cover paper had copper metallic stripes and I used velvet flowers & leaves, vintage buttons, and a tassel made with ribbon, string, yarn, beads, feathers, and a copper garden tag.

Postage Stamps, vintage devotional card, metallic covered eggshells

Dictionary page, beads, rubber stamping, copper letters, copper sheet, clear disc (highlighting the word copper).

Rubber stamping, postage stamp, pressed leaves, skeleton leaf, hand lettering.

Rubber stamping, postage stamps, collage elements, hand lettering.
Wire dress, joss paper.
Vintage postcard, copper photo corners, hand lettering.

More coming soon...